Product Description
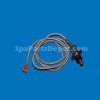
Each spa is equipped with a high limit thermistor that is used as temperature sensor. The thermistor is a semiconductor that changes resistance with temperature changes (as the temperature goes up, the resistance goes down). The high limit thermistor trips if the water temperature exceeds 118 degrees F.
The thermistor must be tested prior to diagnosing the electronic high limit circuit board.
NOTE: BYPASSING A THERMISTOR OR SHORTING THE TERMINALS WILL CAUSE THE SPA HEATER TO SHUT DOWN. NEVER ATTEMPT TO BYPASS OR ELIMINATE A THERMISTOR FROM THE CIRCUIT.
High Limit Tripping in Cold Weather Start-ups
The high limit is a safety device designed to shut down the heater, jet pump, and spa light (the ozonator remains on) if the water temperature exceeds 118 degrees F. All 1995 to current Tiger River and Hot Spring spa models are equipped with an electronic high limit circuit. The electronic high limit circuit uses an electronic component called a thermistor, which senses water temperature by changing its electrical resistance .
In below-freezing climates, technicians and delivery personnel occasionally run into symptoms of electronic high limit tripping when trying to start up a new spa (or a spa that has been stored empty). In the high limit tripped condition, only the circulation pump will operate (the heater, lamp, and jet pump will not operate). In Hot Spring models, the Power-On LED will blink to indicate the high limit circuit has shut down the spa.
High limit tripping at start up is most common in spas that have been stored outside or in unheated areas. This is because thermistors installed in empty spas are sensitive to very cold weather (in filled spas the warm water keeps the thermistor in its normal operating range). If the temperature of the high limit thermistor is near or below 32 degrees F, its resistance increases significantly. The very high resistance of the cold thermistor is outside of the normal operating range, so the high limit circuit shuts down the spa.
To get the spa up and running, you will need a THERMISTOR TEST TOOL (P/N 70924). The following procedure explains how to by-pass the high limit thermistor by using the test tool. This will allow the heater to begin warming the spa water, which will warm the high limit thermistor and get the resistance within operating range.
High Limit Thermistor Bypass Procedure for Cold Weather Start-Up
1. Disconnect power (trip the G.F.C.I.) and access the equipment compartment. 2. Locate the HIGH LIMIT thermistor plug on the side of the control box. 3. Unplug the HIGH LIMIT thermistor from the control box. 4. On the thermistor test tool, each plug is labeled. Locate the "HIGH LIMIT" plug and plug it into the control box. 5. Turn the thermistor test tool knob clockwise to maximum rotation (this simulates a thermistor in the normal operating range). 6. Set the control thermostat to maximum. 7. Apply power to the spa, which should now function normally. 8. To unfreeze the high limit thermistor, allow the spa to run for at least ten minutes. If the spa water is below 40 degrees F, you will need to run the spa a little longer. 9. Disconnect power to the spa and unplug the thermistor test tool from the control box. 10. Plug the high limit thermistor into the control box. 11. Wait at least thirty seconds then reapply power to the spa. 12. Check all spa functions. If the spa will not operate, check the high limit thermistor plug to be sure it is completely installed. If it is properly plugged in and the spa remains inoperative, the high limit thermistor may still be too cold. 13. Attempt the procedure again. WARNING! NEVER LEAVE A THERMISTOR TEST TOOL IN A SPA. Thermistors are an important safety device, and should never remain bypassed, unless the spa is under supervision and not in use. Allowing a thermistor to remain bypassed may injure bathers or cause damage to the spa, which is not covered by the warranty.
Specifications:
*
(back to top) Removal
1. Disconnect power from the spa. 2. Access the equipment compartment. 3. Locate the control thermistor on the heaterbody. The control thermistor will always be installed on the inlet side of the heaterbody. 4. Follow the thermistor wire from the thermistor to the control box. 5. Unplug the control thermistor from the control box. 6. Using hose clamp pliers, clamp the heater inlet, outlet and bleedline tubing. 7. Remove the control thermistor from the heaterbody. 8. Thread the new control thermistor into the opening. HAND TIGHTEN ONLY! 9. Using a wrench, tighten the control thermistor turn only. Do not tighten more than turn. Overtightening the control thermistor will cause damage to the thermistor and/or heaterbody.
- Location: HSR1B11


